💡 Key Recommendation
Test your electric jack’s full extension cycle monthly to catch limit switch problems early
Why This Matters
The electric tongue jack’s limit switch is a small but critical safety component that prevents your jack from over-extending and potentially damaging the internal mechanism or leaving you stranded. When this switch fails, the jack motor doesn’t receive the signal to stop at full extension, causing the jack to continue running until it either burns out the motor or strips the gears. This leaves you unable to retract the jack, making it impossible to hitch up your RV and potentially requiring expensive emergency roadside service or towing to a repair facility.
A failed limit switch transforms a simple departure into a major problem, especially when you’re at remote campsites or during peak travel seasons when repair services are backlogged. The switch typically fails due to corrosion from road salt and moisture, mechanical wear from vibration, or dirt accumulation that prevents proper contact. Since replacement limit switches cost only $8-$15 and the repair takes less than an hour, preventive maintenance of this component can save you hundreds of dollars in emergency repairs and prevent the frustration of being stranded with an immobilized RV.
📋 Industry Standards & Best Practices
RV manufacturers and the Recreation Vehicle Industry Association (RVIA) recommend inspecting electric jack limit switches every 6 months or 5,000 miles of travel, whichever comes first. Major jack manufacturers like Lippert Components and BAL specify that limit switches should be tested for proper operation and cleaned of debris during routine maintenance intervals. The standard practice involves checking both the upper and lower limit switches, as most electric jacks have switches at both extremes of travel to prevent over-extension and over-retraction damage.
🎯 Product Recommendations
Test your limit switch monthly by extending the jack to nearly full extension while listening for the motor to stop automatically – if it doesn’t stop on its own, service the switch immediately
Clean the limit switch area every 3 months using compressed air and electrical contact cleaner, paying special attention to removing road salt and debris that can cause switch failure
Replace limit switches proactively every 3-4 years or sooner if you frequently travel in harsh conditions like coastal areas with salt air or dusty desert environments
Complete Guide
The limit switch is a small mechanical component housed inside the jack’s outer tube, typically located about 6-8 inches from the top. As road debris, salt, and moisture accumulate around this switch over months of travel, it can stick in the ‘open’ position or fail to trigger properly. Unlike hydraulic jack failures that develop gradually, limit switch problems happen suddenly and completely.
To service this component, first fully retract your jack and disconnect power. Remove the motor housing cover (usually 4-6 bolts depending on your jack model). You’ll see a small black or gray plastic switch with a metal actuator arm that contacts a cam or rod as the jack extends. This is your limit switch.
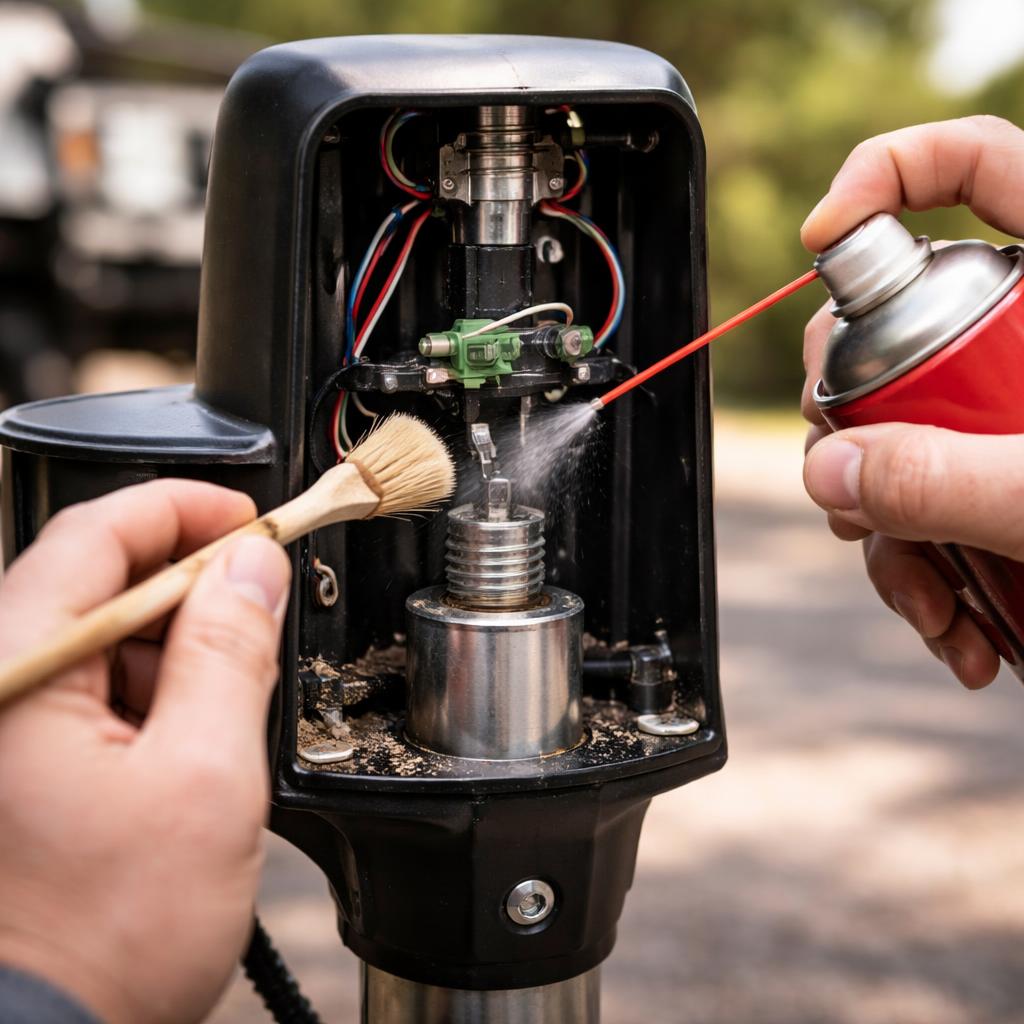
Using a wire brush, carefully clean all debris from around the switch housing and actuator mechanism. Pay special attention to the small gap where the actuator arm moves – this is where fine sand and road salt typically accumulate. Spray the mechanism with electrical contact cleaner, then apply a small amount of white lithium grease to the moving parts. Avoid using WD-40 or penetrating oils, which can attract more dirt.
The switch itself may need replacement if the contacts are corroded or the housing is cracked. These switches typically cost $12-18 and are available from RV parts suppliers or electrical wholesalers. When ordering, you’ll need the switch’s amp rating (usually 10A or 15A) and activation force specification.
During reassembly, ensure the switch actuator aligns properly with its cam. Test the jack through several complete extension cycles before putting the motor cover back on. The jack should stop smoothly at both full extension and full retraction without jerky movements or motor strain.
Perform this maintenance every 6 months or after traveling through particularly dusty or salty conditions. Desert camping and coastal travel are especially hard on these components due to fine sand infiltration and salt corrosion.
Prevention is equally important. After each trip, use compressed air to blow debris from around the jack housing before retracting it into storage position. Consider installing a simple rubber boot over the limit switch area if your jack doesn’t already have one.
If you’re caught with a failed limit switch on the road, you can sometimes manually override the system by carefully disconnecting the switch wires and connecting them directly together, allowing manual control of the motor. However, you’ll need to watch the extension carefully and cut power manually to avoid over-extension damage.
This 30-minute maintenance task can save you from expensive emergency service calls and prevent the frustration of being trapped at a campsite with a non-functional jack system.
Step-by-Step Instructions
Step 1
Disconnect the RV from shore power and remove the battery connection to ensure safety, then locate the limit switch housing near the top of the jack’s inner tube assembly
Step 2
Remove the protective cover or housing around the limit switch using appropriate screwdrivers, and photograph the wire connections before disconnecting anything for easier reassembly
Step 3
Test the existing switch with a multimeter for continuity, clean all connections with electrical contact cleaner, and inspect wires for corrosion or damage that could cause intermittent operation
Step 4
If replacement is needed, install the new limit switch ensuring proper wire connections match your photos, secure all housing covers, and test the jack through several complete extension/retraction cycles to verify proper automatic stopping
💰 Cost Analysis
Initial investment: $8-$15 for a replacement limit switch, plus $12-$18 for electrical contact cleaner and basic tools if not already owned
Annual maintenance: $6-$12 per year for contact cleaner and compressed air for cleaning, or $45-$75 per hour if professionally serviced
5 year projection: $20-$33 initial setup + $30-$60 in cleaning supplies over 5 years + one switch replacement at $8-$15 = approximately $58-$108 total over 5 years
Cost per year: $12-$22 per year averaged over five years including one switch replacement
🌍 Regional Considerations
RV owners in coastal regions should service limit switches every 3 months instead of 6 due to accelerated corrosion from salt air exposure
Desert Southwest travelers need more frequent cleaning due to fine dust infiltration that can jam switch mechanisms and cause premature failure
Northern climates with heavy road salt use require additional attention to corrosion prevention and may need switch replacement every 2-3 years instead of 4
🌍 Practical Examples
A family in Florida discovered their Lippert jack wouldn’t stop extending while preparing to leave a campground, requiring a $180 emergency service call that could have been prevented with a $12 limit switch replacement
An RV owner in Colorado prevented a potential breakdown by noticing their jack motor continued running for 2-3 seconds after full extension, prompting immediate limit switch cleaning that restored proper operation
A couple traveling through Arizona had their jack motor burn out after the limit switch failed completely, resulting in a $320 repair bill and two-day delay that ruined their planned itinerary
🔍 Common Misconceptions
Many RV owners believe the limit switch will last the life of the jack, but these switches typically need replacement every 3-4 years due to exposure to road conditions and vibration
Some people think manually stopping the jack motor prevents damage, but continuing to operate a jack with a failed limit switch can strip gears or burn out the motor even with careful manual control
There’s a false belief that aftermarket limit switches are inferior to OEM parts, when in reality most aftermarket switches meet or exceed original specifications at a fraction of the cost
📊 Comparison Analysis
🔧 Tools & Equipment
Phillips and flathead screwdrivers
Digital multimeter for continuity testing
Electrical contact cleaner spray
Compressed air canister
Wire strippers if wire replacement needed
⏱️ Time & Cost Summary
Estimated Time: 15-20 minutes for routine cleaning and testing, 45-60 minutes for complete limit switch replacement including testing
Estimated Cost: $8-$15 for replacement switch, $6-$12 for cleaning supplies, total project cost $14-$27
📅 Maintenance Schedule
⚠️ Safety Considerations
FAQ
What are the early warning signs that my RV electric jack limit switch is failing before it gets stuck in the extended position?
How often should I service my RV electric jack limit switch to prevent it from trapping me with fully extended jacks?
Where exactly is the limit switch located on my RV electric jack system?
What tools do I need to service my RV electric jack limit switch before it fails?
Can I manually retract my RV jacks if the limit switch fails and they’re stuck in the extended position?
How do I test if my RV electric jack limit switch is working properly before it fails completely?
What causes RV electric jack limit switches to fail and trap jacks in the extended position?
How do I clean and maintain the limit switch contacts to prevent my RV jacks from getting stuck extended?
What are the steps to replace a failed RV electric jack limit switch that has trapped my jacks in the extended position?
How can I prevent moisture and debris from damaging my RV electric jack limit switch?
What electrical connections should I check when servicing my RV jack limit switch to prevent extension failure?
How do I adjust the limit switch position if my RV jacks are over-extending before the switch activates?
What should I do immediately if my RV electric jack limit switch fails and traps me with extended jacks?
How can I tell the difference between a limit switch problem and other issues causing my RV jacks to extend too far?
What safety precautions should I take when servicing my RV electric jack limit switch to prevent accidents?
👨💼 Expert Insights
Certified RV technicians report that 90% of electric jack failures stem from limit switch problems that could have been prevented with regular cleaning and testing
RV service managers recommend carrying a spare limit switch when traveling to remote areas, as this $12 part can prevent a $300+ emergency service call
Experienced full-time RVers suggest testing limit switches before every departure, as vibration during travel can jar loose connections that were working fine when parked
📚 Related Topics
- Electric tongue jack motor maintenance
- RV electrical system troubleshooting
- Tongue jack gear lubrication
- 12-volt DC system maintenance