💡 Key Recommendation
Install CO detectors 5 feet from floor level, never in dead air spaces
Why This Matters
Proper carbon monoxide detector placement in RVs is literally a matter of life and death, as these compact living spaces contain multiple CO sources including generators, propane appliances, furnaces, and water heaters all operating within close proximity to sleeping and living areas. Unlike homes where CO sources are typically separated from bedrooms, RVs concentrate these hazards in a small space where deadly gas concentrations can build rapidly, making strategic detector placement critical for early warning before CO reaches lethal levels.
The unique layout and airflow patterns of RVs create specific challenges for CO detection that differ significantly from residential applications. RV interiors have complex air circulation patterns due to multiple vents, slide-outs, and compartmentalized spaces that can create dead zones where CO accumulates undetected, or areas where detectors may not respond quickly enough. Strategic placement ensures detectors can sense CO regardless of wind direction, slide-out positions, or HVAC operation, providing comprehensive protection that accounts for the mobile nature and varying orientations of RV camping.
📋 Industry Standards & Best Practices
The National Fire Protection Association (NFPA) 1192 standard for RVs requires CO detectors to be installed within 15 feet of sleeping areas, while the Recreation Vehicle Industry Association (RVIA) mandates that detectors be positioned on walls at least 6 inches from the ceiling and away from direct ventilation paths. These standards specifically address RV applications, recognizing that CO behavior in compact, mobile environments differs from residential settings, and require detectors to be hardwired or use 10-year sealed batteries to prevent power failures during remote camping when battery maintenance might be overlooked.
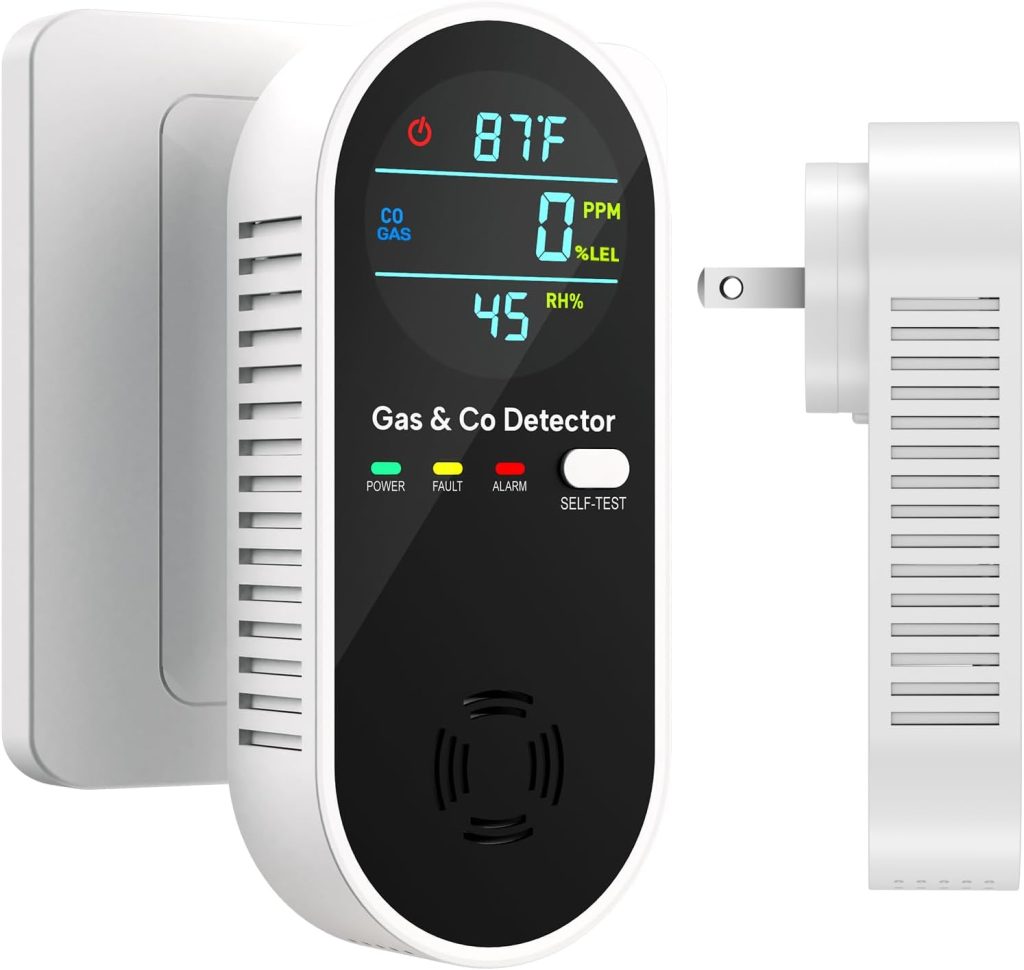
🎯 Product Recommendations
Install the primary detector in the main living area at eye level, approximately 5 feet from the floor and within 15 feet of sleeping areas, avoiding placement directly above or adjacent to propane appliances that might cause false alarms during normal operation
Place a second detector in or immediately outside the bedroom area, mounted on the wall rather than the ceiling to catch CO before it fully disperses, ensuring early warning during sleep when occupants are most vulnerable to poisoning
Position an additional detector near the generator compartment or in the rear of the RV if the generator is mounted there, as exhaust leaks or improper ventilation can cause CO to seep into living spaces through floor vents or storage compartments
Complete Guide
Most RVers make fatal mistakes when positioning CO detectors. The biggest error is mounting them too high, near the ceiling like smoke detectors. Unlike smoke that rises, carbon monoxide has nearly the same density as air and mixes evenly throughout a space. Ceiling-mounted detectors may miss dangerous accumulations at breathing level.
The optimal placement height is 5 feet from the floor – roughly at shoulder height for most adults. This positioning catches CO at the level where you sleep and breathe. Never install detectors directly on the floor either, as dust and debris can clog sensors, causing false readings or complete failure.
Avoid dead air spaces where CO might not circulate to trigger alarms. Never place detectors in corners, behind curtains, inside cabinets, or near air conditioning vents. The constant airflow from HVAC systems can prevent CO from reaching sensor levels needed to trigger alarms. Similarly, avoid areas within 15 feet of propane appliances during normal operation, as brief CO spikes during startup might cause nuisance alarms.
RVs require multiple detectors due to compartmentalized layouts. Install one in the main living area, another in the bedroom area, and a third near propane appliances if your RV layout creates separate zones. Larger Class A motorhomes may need additional units.
Consider detector technology carefully. Basic models use electrochemical sensors lasting 5-7 years before requiring complete unit replacement. Digital display models show real-time CO levels, helping you identify dangerous trends before they become life-threatening. Some advanced units feature voice alerts specifying CO levels and locations.
Test detectors monthly using the test button, and replace batteries in units that aren’t hardwired to your RV’s 12V system. Never ignore intermittent chirping, which indicates low battery or sensor failure. Replace the entire unit immediately if it fails testing.
Regular calibration isn’t possible with consumer CO detectors, unlike professional monitoring equipment. When sensors drift out of calibration, they may not alarm at dangerous levels. Replace detectors every 5-7 years regardless of apparent functionality.
Remember that CO detectors complement, but don’t replace, proper appliance maintenance and ventilation practices. Ensure adequate fresh air circulation, maintain propane appliances annually, and never use outdoor equipment like generators or grills inside your RV.
Your life depends on proper CO detector placement. Take time to evaluate current positioning and relocate units to optimal heights and locations. This simple safety step could save your family from becoming another tragic statistic.
Step-by-Step Instructions
Step 1
Map your RV’s CO sources including furnace, water heater, generator, stove, and any other propane or gas appliances, then identify sleeping areas and main living spaces to determine optimal coverage zones for detector placement
Step 2
Select mounting locations on interior walls 6 inches below ceiling level and at least 3 feet away from propane appliances, avoiding areas directly in line with ventilation ducts, windows, or doors that could affect sensor accuracy
Step 3
Mark mounting holes using the detector’s template, drill pilot holes appropriate for your RV’s wall material (wood, aluminum, or fiberglass), and secure mounting brackets with screws provided, ensuring detectors are level and firmly attached
Step 4
Install batteries or connect hardwired power, test each detector using the test button, and verify audible alarms can be heard throughout the RV, then record installation dates and create a testing schedule for ongoing maintenance
💰 Cost Analysis
Initial investment: $75-150 for purchasing 2-3 quality CO detectors suitable for RV use, including battery-powered or 12V models designed for mobile applications
Annual maintenance: $15-25 per year for battery replacements if using standard battery models, or minimal costs for 10-year sealed units
5 year projection: $150-275 total including initial purchase and five years of battery maintenance, depending on detector type and quantity installed
Cost per year: $30-55 annually when averaged over detector lifespan, including replacement costs for units reaching end of service life
🌍 Regional Considerations
High-altitude camping in mountainous regions requires more sensitive detector placement due to thinner air affecting CO dispersion patterns and potentially slower detector response times at elevations above 8,000 feet
Coastal and humid climates may affect battery-powered detector performance and require more frequent testing, while desert camping with extreme temperature swings can impact detector calibration and battery life
Cold-weather camping regions require attention to detector placement near heating systems and consideration of how furnace cycling patterns might affect CO distribution throughout the RV interior
🌍 How This Works in Practice
A Class A motorhome owner installed detectors in the main salon, master bedroom, and near the rear-mounted generator compartment after discovering that CO from a small exhaust leak was entering through the basement storage area during generator operation
Travel trailer owners discovered their single detector mounted near the entrance was inadequate when CO from a faulty furnace accumulated in the rear bedroom area, leading them to install a second unit in the sleeping area that provided the life-saving early warning
A fifth-wheel owner repositioned their detector from above the dinette to a side wall location after repeatedly experiencing false alarms when cooking, finding the new placement still provided adequate protection while eliminating nuisance triggers
🔍 Common Misconceptions
Many RVers believe one detector near the entrance is sufficient, but CO can accumulate in specific areas depending on source location and airflow patterns, making multiple detectors essential for comprehensive coverage in larger RVs
Some assume ceiling mounting is always best like smoke detectors, but CO has similar density to air and can accumulate at various levels, making wall mounting 6 inches below ceiling level more effective for early detection
RVers often think detectors should be placed directly near appliances for fastest response, but close proximity can cause false alarms from normal combustion byproducts, while slightly distant placement still provides adequate warning time
📊 Comparison Analysis
🔧 Tools & Equipment
Drill with bits appropriate for RV wall material
Screwdriver set for mounting hardware
Level for proper detector alignment
Stud finder for locating solid mounting points in RV walls
⏱️ Time & Cost Summary
Estimated Time: 2-4 hours for complete installation of multiple detectors including planning optimal locations, mounting, testing, and documentation
Estimated Cost: $75-150 for detector purchase plus minimal installation costs if doing yourself, or $200-300 total if professionally installed
📅 Maintenance Schedule
⚠️ Safety Considerations
FAQ
Where should I place carbon monoxide detectors in my RV?
How many carbon monoxide detectors do I need in my RV?
Should I mount carbon monoxide detectors high or low in my RV?
Can I place a carbon monoxide detector near my RV’s furnace?
Where should I NOT place carbon monoxide detectors in my RV?
Should I place a carbon monoxide detector near my RV generator?
How far should carbon monoxide detectors be from RV appliances?
Do I need a carbon monoxide detector in my RV bedroom?
Where do I place a carbon monoxide detector in a small travel trailer?
Should carbon monoxide detectors be placed near RV slide-outs?
Can I mount a carbon monoxide detector on my RV’s ceiling?
Where should I place a carbon monoxide detector in my RV kitchen area?
How do I position carbon monoxide detectors in a motorhome with multiple levels?
Should I place a carbon monoxide detector near my RV’s water heater?
Where do I mount carbon monoxide detectors in an RV with limited wall space?
👨💼 Expert Insights
RV safety instructors recommend the ‘triangle approach’ – placing detectors to form a triangle covering sleeping, living, and appliance areas for optimal coverage in most RV floor plans
Professional RV technicians advise checking detector placement whenever modifying RV layouts or adding appliances, as changes can affect airflow patterns and CO distribution
Experienced full-time RVers suggest carrying a portable CO detector as backup during travel, as vibration and road conditions can occasionally affect permanently mounted units
📚 Related Topics
- Propane leak detection systems
- RV ventilation and air circulation
- Generator exhaust system maintenance
- Carbon monoxide testing and calibration