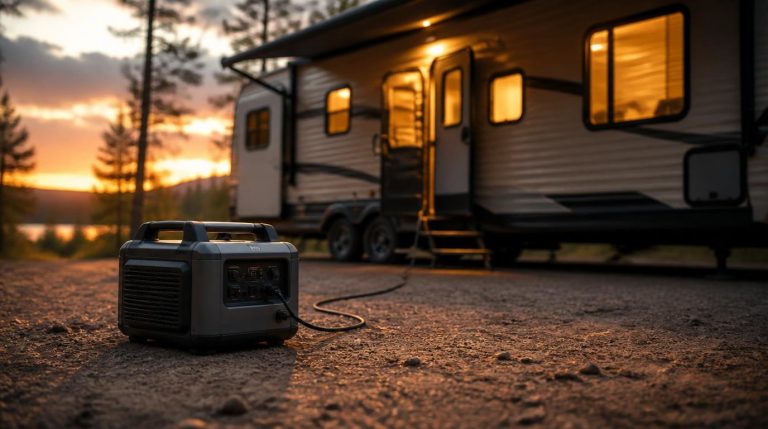
Complete RV Dumping Guide: How to Empty RV Holding Tanks Safely
Part of our complete RV Water & Sewer resource series – RV Water & Sewer Solutions Hub
RV dumping is one of those tasks that sounds simple on the surface but catches a lot of new owners off guard. There is no standard procedure posted at every dump station. Your RV manual covers the basics but skips the real-world details. And asking for help at a campground feels awkward when everyone around you seems to already know what they are doing.
The reality is that dumping your tanks incorrectly has real consequences. Do it wrong and you risk a sewage spill, a hose blowout, persistent odors inside your rig, clogged sensors, or a blocked tank that takes professional service to clear. None of those outcomes are minor inconveniences.
This guide is written to eliminate that confusion. It covers what RV dumping actually involves, what gear you need before you start, a clear step-by-step process for draining your tanks, and how to handle the problems that come up in real use. Whether you are new to RV ownership or just looking to sharpen your process, this guide gives you a reliable, repeatable procedure.
Note: This guide covers the dumping procedure itself. If you want to understand how to manage your tanks between dumps – odor control, treatments, pyramid plug prevention, and long-term maintenance – read our companion guide: RV Sewer Waste Management Guide.
What RV Dumping Actually Means
RV dumping refers to the process of emptying your onboard holding tanks into an approved waste receptacle – either at a dedicated dump station or through a sewer connection at a full-hookup campsite.
Here is what each component means:
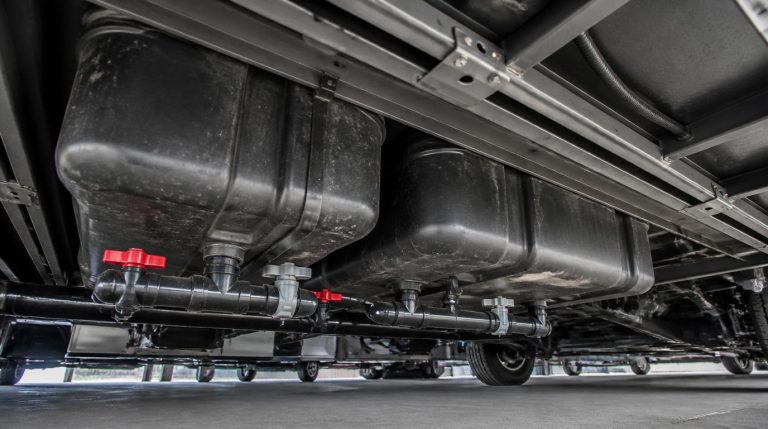
- Black tank: This holds waste from your toilet. It is the tank that requires the most careful handling and the most attention during the dumping process.
- Gray tank: This collects water from your sinks and shower. It is less hazardous than the black tank but still needs to be emptied regularly.
- Dump station: A designated facility – found at campgrounds, RV parks, travel centers, and some public rest stops – with a sewer inlet, a water source for rinsing, and enough space to maneuver your RV.
- Sewer hose system: The flexible hose that connects your RV’s tank outlet to the sewer inlet. It typically comes in sections that can be extended to reach the drain opening. This hose is the critical link in the entire process.
What You Need Before Dumping
Having the right gear ready before you pull into a dump station saves time and prevents mistakes. Here is what you need and why each item matters:
- Sewer hose kit: The core piece of equipment. A standard kit includes a 10-foot hose with fittings. Many RVers carry 15-20 feet total to handle dump stations with awkward inlet placement. Look for a heavy-duty hose with a secure bayonet fitting on both ends.
- Clear elbow adapter: This transparent fitting connects your hose to the dump station inlet and lets you see when the tank has fully drained. It is optional but genuinely useful, especially for beginners who cannot judge flow by sound alone.
- Disposable gloves: Non-negotiable. Wear them every time, regardless of how careful you plan to be. Nitrile gloves are ideal because they resist punctures and are easier to remove without contaminating your hands.
- Dedicated rinse hose: A separate hose used only for rinsing your sewer hose and equipment. This must never be your fresh water drinking hose. Mark it clearly and store it separately. Cross-contamination between these two hoses is a serious sanitation risk.
- Sewer hose support: An optional but helpful accessory that holds your hose in a downward slope from the RV to the drain. Gravity assists drainage, and a supported hose is less likely to kink, pull loose, or puddle waste mid-line.
Step-by-Step: How to Dump RV Tanks
Follow this process in order. Skipping steps or rearranging them is where most mistakes happen.
Step 1: Put on Gloves
What to do: Put on your nitrile gloves before touching any part of your sewer hose or the dump station inlet.
Why it matters: Even a dry, unused hose carries bacteria from previous use. Handling connections without gloves exposes you to pathogens.
Common mistake: Skipping gloves because you expect a clean process. RV dumping is inherently messy and unpredictable. Always glove up first.
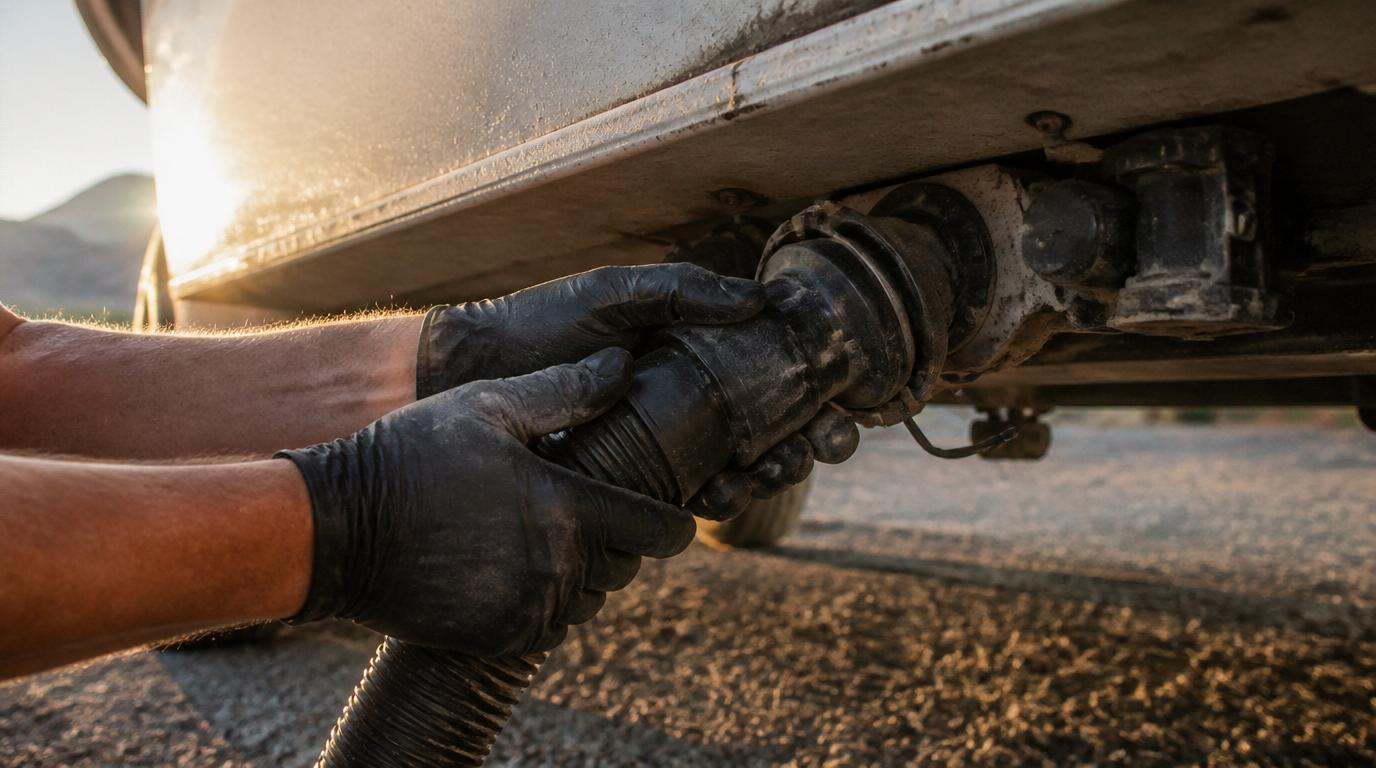
Step 2: Connect the Sewer Hose to Your RV
What to do: Attach one end of your sewer hose to the outlet fitting on your RV. Twist it firmly until it locks into place. Give it a gentle tug to confirm it is seated correctly.
Why it matters: A loose connection at the RV end is the most common cause of spills. The fitting must be locked, not just snug.
Common mistake: Attaching the dump station end first. Always start at the RV end so you are working away from the waste source.
Step 3: Attach the Clear Elbow (If Used)
What to do: Connect your clear elbow adapter to the open end of the hose, then insert it into the dump station inlet. Press it firmly into the inlet to create a seal.
Why it matters: The elbow keeps waste contained at the sewer inlet and lets you monitor drainage visually.
Common mistake: Leaving an air gap between the hose and the sewer inlet. Even a small gap allows odors to escape and risks splatter during heavy flow.
Step 4: Open the Black Tank Valve First
What to do: Locate the black tank pull handle or blade valve and pull it fully open. Stand clear during initial flow.
Why it matters: Opening the black tank first is the correct sequence. The gray tank drains after to rinse the hose. Reversing the order leaves waste residue in a hose you can no longer flush out efficiently.
Common mistake: Opening both valves at once to “save time.” This reduces the flushing benefit of the gray water and can slow overall drainage.
Step 5: Allow the Black Tank to Fully Drain
What to do: Wait until flow stops completely. If you have a clear elbow, watch until the liquid running through it is clear or nearly clear. If you have a tank flush system, this is the point to use it.
Why it matters: Partial draining leaves waste to solidify in the tank, which leads to sensor fouling, odors, and eventual blockages.
Common mistake: Closing the valve before flow fully stops because you are in a hurry. Give the tank the time it needs.
Step 6: Close the Black Tank Valve
What to do: Push the black tank valve fully closed. Confirm it is seated completely – a half-closed valve is the same as an open one.
Why it matters: The valve must be sealed before you disconnect anything. An open valve with a disconnected hose creates an immediate spill.
Common mistake: Assuming the valve is closed because you pushed it partway. Push it all the way and confirm.
Step 7: Open the Gray Tank Valve
What to do: Pull the gray tank valve fully open and allow it to drain completely.
Why it matters: Gray water flushes soapy water and sink debris through the hose, cleaning out most of the black tank residue left inside the hose walls.
Common mistake: Not waiting for the gray tank to fully drain before moving to disconnection.
Step 8: Close the Gray Tank Valve and Disconnect
What to do: Close the gray tank valve, then carefully remove the hose from the dump station inlet. Hold the dump station end lower than the RV end as you disconnect to prevent dripping.
Why it matters: Residual liquid in the hose will flow out if you invert it carelessly.
Common mistake: Pulling the hose out quickly and letting the open end swing around. Move deliberately and keep the hose pointed down.
Step 9: Rinse the Hose
What to do: Using your dedicated rinse hose, flush water through the sewer hose into the dump station drain. Cap or plug both ends when finished.
Why it matters: Residue left inside the hose degrades the material over time and creates persistent odors in your storage bay.
Common mistake: Using your fresh water hose to rinse sewer equipment. Keep these hoses permanently separated.
Step 10: Rinse the Dump Station Area and Store Properly
What to do: Rinse any residue from the dump station pad, remove gloves inside-out and dispose of them, then store your hose in its designated compartment.
Why it matters: Dump stations are shared resources. Leaving them clean is both courteous and required at most facilities.
Common mistake: Storing a wet hose without caps on the fittings. Moisture inside the stored hose accelerates odor buildup.
Why You Always Dump Black First, Then Gray
This is one of the most important rules in RV dumping, and the reasoning is straightforward: your gray tank rinses the hose.
When you drain the black tank first, waste travels through the full length of your sewer hose. After the black tank is empty and closed, opening the gray tank sends relatively clean water – soap residue, food particles, shower water – through that same hose. This flushes out the majority of black tank residue sitting inside the hose walls.
If you reverse the order and dump gray first, you lose the natural flushing cycle. Black tank waste then sits in the hose during disconnect and storage, which means stronger odors and more bacterial growth inside the equipment.
Black first. Always. There is no situation where this order should be reversed.
How to Flush Your Black Tank Properly
Draining the black tank removes liquid waste, but a proper flush removes the solids and residue that cling to the tank walls. This step matters for sensor accuracy, odor control, and long-term tank health.
Built-In Flush Systems
Many newer RVs include a built-in black tank flush port – a separate water inlet that connects to a rinse wand inside the tank. Connect your rinse hose to this port while the black tank valve is open, run water for five to ten minutes, and let the tank drain fully. Watch the clear elbow and shut off when the water runs clear.
External Flush Tools
If your RV does not have a built-in flush system, external wand attachments are available. These insert through the toilet bowl and connect to a water source to spray the tank walls directly. They are effective but slower than built-in systems.
Safety warning: Never leave the flush running while unattended. A clogged drain or full sewer inlet can cause wastewater to back up into your RV. Stay at the connection and monitor pressure and flow throughout the flush cycle.
Common RV Dumping Mistakes
- Leaving the black tank valve open at full hookup sites: This is the single most damaging habit in RV ownership. When the valve stays open, liquids drain continuously but solids accumulate and dry into a cement-like mass called a pyramid plug. Once formed, removal can require professional service. Keep the black tank valve closed between dedicated dump sessions.
- Dumping too frequently with a near-empty tank: Tanks need adequate liquid volume to move waste effectively. Dumping when the tank is less than two-thirds full means low flow pressure, which leaves residue behind. Wait until the tank is at least two-thirds full before dumping.
- Using the wrong hose: Using your fresh water hose to rinse sewer equipment – even once – contaminates it. Mark all hoses clearly and store them in separate compartments.
- Not rinsing the hose after dumping: Waste residue left inside a stored hose degrades the material and creates strong odors in your storage compartment. Rinse the hose every single time.
- Poor hose positioning: A hose that sags in the middle creates a low point where waste pools instead of flowing to the drain. Use a hose support to maintain a consistent downhill slope.
- Rushing the process: Skipping confirmation steps – like checking that valves are fully closed before disconnecting – causes the kind of spills that end camping trips early. The entire process takes ten to fifteen minutes done correctly.
Dump Station Etiquette
- Prepare before you pull in: Have your hose, gloves, and adapter ready before you occupy the station. Spending five minutes searching through compartments while others wait is unnecessary and inconsiderate.
- Be efficient: Dump your tanks, flush if needed, rinse your equipment, and move. A basic dump and rinse should take no longer than ten to fifteen minutes.
- Clean the area after use: Rinse the pad where you were working. Leave the station in the same condition – or better – than you found it.
- Respect the wait: If there is a line, do not run extended flush cycles that keep others waiting.
Troubleshooting Common Dumping Issues
Slow Draining Tank
Slow drainage usually indicates a partial blockage, inadequate liquid level in the tank, or a kinked hose. Check the hose for sags or kinks first. If the hose is clear, the issue is likely inside the tank. Adding water before dumping – running a few gallons through the toilet – can help break up dry deposits enough to allow flow.
Clogs or Blockages
A full blockage that prevents drainage at all often requires a tank treatment product, extended soaking with water, or in serious cases, professional service. The most common cause is paper buildup from using inappropriate toilet paper or from keeping the valve open at hookup sites. RV-specific toilet paper that dissolves quickly is worth using.
Strong Odors During Dumping
Some odor during dumping is normal when the black tank valve first opens. Persistent or extreme odors often indicate that the tank has not been properly maintained between dumps – either the liquid level has been too low, or tank treatment products have not been used. The dump itself will not fix an odor problem that originates from poor tank management.
Leaking Connections
A leaking connection during dumping is almost always a fitting problem. Either the hose is not fully seated at the RV outlet, the clear elbow is not sealed at the dump station inlet, or a fitting is damaged or worn. Close the valve immediately if a leak develops, recheck all connections, and do not proceed until the leak is resolved.
Stuck Valves
Valves that are difficult to pull open or push closed may be warped, corroded, or have dried debris in the channel. Do not force a stuck valve with excessive pressure. Valve lubricant applied to the gate mechanism can help. If a valve is leaking in the closed position, it likely needs replacement.
When Dumping Isn’t the Real Problem
If you are dealing with recurring issues – persistent odors, inaccurate tank sensors, chronic slow drainage, or frequent clogs – the problem is almost certainly not how you dump. It is how you manage those tanks between dumps.
Common contributors to chronic problems include:
- Not using enough water with each toilet flush
- Leaving the black tank valve open at hookup sites
- Using standard household toilet paper instead of RV-grade or quick-dissolve paper
- Not using tank treatment products to manage bacteria and break down solids
- Infrequent or incomplete flushes that allow residue to accumulate on tank walls and sensors
Fixing a chronic odor problem by dumping more frequently will not work. What works is addressing the root cause in your everyday system management.
For a complete breakdown of how to manage tank health between dumps – including treatment products, water ratios, sensor maintenance, and preventing pyramid plugs – read our companion guide: RV Sewer Waste Management Guide: Black Tank, Gray Tank, Odor Control and Maintenance.
Explore our full RV Water & Sewer resource library: RV Water & Sewer Solutions Hub