RV Sewer Waste Management Guide
Part of our complete RV Water & Sewer resource series – RV Water & Sewer Solutions Hub
Looking for the step-by-step dumping procedure? This guide covers system management – what you do between dumps. For the actual tank-emptying process, valve sequence, hose connection, and dump station etiquette, see our companion guide: Complete RV Dumping Guide: How to Empty RV Holding Tanks Safely.
Sewer problems are among the most common complaints from RV owners – and most of them are preventable. Persistent odors, clogged tanks, fouled sensors, and slow drainage rarely happen because something broke. They happen because of habits.
Most RV owners understand that they need to dump their holding tanks, but far fewer understand how to manage those tanks between dumps. The difference between a sewer system that works reliably for years and one that creates constant problems almost always comes down to what happens day to day: how much water you use, when you open the valve, what you put down the toilet, and how you treat the tank before and after dumping.
This guide focuses on system management. It explains how the waste system actually works, what each component needs to function correctly, and what habits and decisions protect the system over time.
How RV Sewer Systems Actually Work
Understanding the system at a basic level makes every management decision easier.
Your RV holds waste in two sealed tanks mounted beneath the floor. The black tank collects all waste from the toilet. The gray tank collects all water from the sinks and shower. Both tanks are sealed and hold waste until you actively empty them at a dump station or sewer hookup.
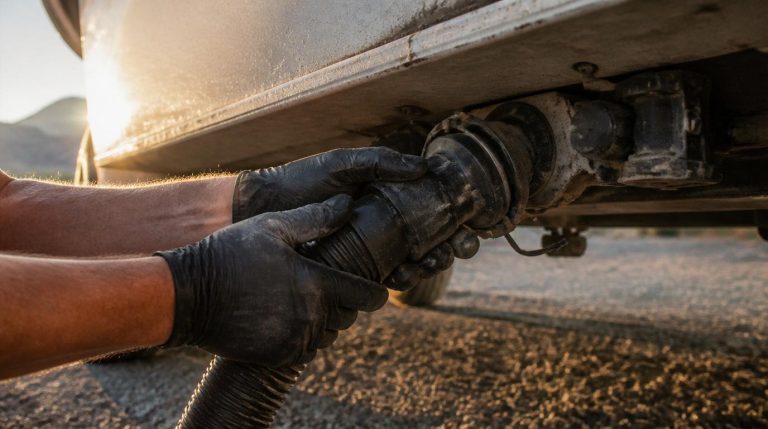
Each tank connects to the exterior through a blade valve – a flat gate that slides open to allow drainage. Nothing flows out until you deliberately open that valve. This design keeps odors contained and gives you control over when waste is released.
Venting is what prevents pressure buildup and pushes odors out of the living space. A dedicated vent pipe runs from the black tank up through the roof of the RV. When everything works correctly, negative pressure pulls air through the toilet bowl and up the vent stack, carrying odors with it. When venting is blocked or insufficient, that pressure has nowhere to go – and odors push back into the RV through the toilet seal.
Water is the system’s working fluid. In a properly managed black tank, waste floats in liquid. Adequate water keeps solids from drying and accumulating, allows waste to move freely toward the valve, and supports the biological activity of any tank treatment you use. Without enough water, the system cannot function as designed.
Black Tank vs Gray Tank
These two tanks behave differently and create different problems. Understanding the distinction helps you manage each one appropriately.
| Black Tank | Gray Tank | |
|---|---|---|
| Receives | Toilet waste only | Sink and shower water |
| Primary risk | Solid buildup, pyramid plugs | Grease and soap buildup |
| Odor source | Bacterial decomposition, low water | Food particles, soap scum |
| Valve rule | Keep closed between dumps | Can be opened more freely at hookups |
| Flush needed? | Yes – regularly | Less critical but beneficial |
| Treatment needed? | Yes | Occasionally helpful |
The Core Black Tank Rules
The black tank is where most RV sewer problems start. The rules below are not suggestions – they are the foundation of a system that works reliably. Each one has a clear reason behind it.
Rule 1: Always Start with Water in the Tank
What to do: Before your first toilet use of any trip, add two to three gallons of water directly to the black tank. Pour it down the toilet or use your flush system to fill the base of the tank.
Why it matters: A dry tank cannot move waste. The water creates the liquid environment that allows solids to break down, float, and eventually drain during dumping. It also activates any treatment product you add and prevents the first flush of waste from sticking directly to the tank floor.
If ignored: Waste from the first use lands on a dry surface and begins drying immediately. Even a single session of concentrated waste on dry plastic creates a residue layer that builds over time into serious blockage.
Rule 2: Use Enough Water with Every Flush
What to do: Hold the flush pedal or activate the flush long enough to send adequate water into the tank with every use. A brief half-second flush is not sufficient. Let water flow for three to five full seconds minimum.
Why it matters: The toilet’s job is not just to remove waste from the bowl – it is to deliver waste into a liquid environment below. Without enough water per flush, solids accumulate faster than liquids, creating the conditions for pyramid plugs and sensor fouling.
If ignored: The tank fills with concentrated solid waste surrounded by minimal liquid. Even a full tank in terms of sensor readings may have very little actual fluid, making proper dumping difficult and increasing the risk of a serious blockage.
Rule 3: Never Leave the Black Tank Valve Open at Full Hookup
What to do: Even when connected to a full sewer hookup, keep the black tank valve closed. Dump it periodically when it is sufficiently full, then close the valve again.
Why it matters: An open valve drains liquids continuously while solids remain. Over days, this creates a growing mass of dried waste – commonly called a pyramid plug – directly over the drain opening. Pyramid plugs are one of the most serious problems in RV waste systems because they can block the tank completely and may require professional service or even tank removal to clear.
If ignored: A pyramid plug can form within a few days at a full hookup site. The first sign is usually slow drainage or a tank that reads full but drains only liquid. At that stage, the damage is already done.
Rule 4: Dump Only When the Tank Is Sufficiently Full
What to do: Wait until the black tank is at least two-thirds full before dumping. If you need to dump sooner, add water to bring the level up before opening the valve.
Why it matters: Volume creates pressure. A tank that is mostly full drains with significantly more force than a partially full one. That pressure is what moves solid waste through the system and out the hose. Low-volume dumps leave residue behind that gradually builds into a problem.
If ignored: Frequent small dumps are often less effective than less frequent full ones. Each incomplete dump leaves more residue, reducing the tank’s effective capacity over time.
Rule 5: Use Appropriate Toilet Paper
What to do: Use toilet paper specifically labeled as RV-safe, septic-safe, or single-ply. It should dissolve quickly in water. If you are unsure about a brand, drop a sheet in a jar of water, shake it, and see how quickly it breaks apart.
Why it matters: Standard household toilet paper is designed to maintain its structure when wet. In an RV black tank, that strength becomes a liability – undissolved paper accumulates and contributes to blockages.
If ignored: Paper that does not dissolve rapidly collects in the tank and can bind with other waste to create dense plugs. This is especially problematic when combined with low water levels.
How to Prevent RV Odors
Odors are the most common complaint in RV waste management. Most have identifiable causes, and most are preventable.
Real Causes of RV Tank Odors
- Low water levels: When liquid in the black tank drops too low, there is nothing to contain decomposition gases. The water layer acts as a seal. Without it, gas escapes freely through the toilet seal and into the RV.
- Poor venting: A blocked or undersized vent stack traps gas inside the tank with nowhere to go. Debris, bird nests, or even atmospheric pressure can restrict roof vents and push odors back into the living area.
- Residue buildup: Waste residue on tank walls continues to off-gas even after dumping. A tank that is not periodically flushed and cleaned will accumulate layers of residue that no treatment product fully neutralizes.
- Improper valve management: A black tank valve left open even slightly allows outside air to contact tank contents and allows gas to escape around the toilet seal. Any valve that does not seat fully creates an ongoing odor source.
What Actually Works
Water is the primary defense against odor. Maintaining an adequate liquid level in the tank – especially during warm weather when decomposition accelerates – does more for odor control than any treatment product.
A consistent dumping routine that does not let tanks sit overfull for extended periods reduces gas volume inside the tank. Regular flushing removes residue from the walls, eliminating the slow off-gassing that builds up between dumps.
Checking and clearing roof vents annually prevents the slow restriction buildup that creates pressure problems. A pipe brush and a garden hose routed from the roof can clear most obstructions.
Tank treatments help – within realistic limits. They support the biological breakdown of waste and reduce gas production. They do not fix odors caused by low water levels or blocked vents. If a treatment product is not working, the underlying cause is almost always a management issue, not a product issue.
Tank Treatments: What They Do and What They Don’t
Tank treatments fall into two main categories. Understanding what each one actually does prevents misplaced expectations.
Enzyme and Bacteria Treatments
These products introduce beneficial microorganisms or enzymes that accelerate the natural breakdown of waste. They work best in warmer temperatures and require adequate water to function. When conditions are right, they reduce solid accumulation and suppress the bacteria responsible for the most aggressive odor compounds.
They do not work well in very cold temperatures. They are not effective in a dry or near-dry tank. And they take time to establish – a tank with significant existing buildup will not be cleaned by a single dose.
Chemical Treatments
Chemical treatments – typically formaldehyde-based or alternative formaldehyde-free versions – work by suppressing bacterial activity rather than supporting it. They mask odor effectively in the short term and are useful for short trips or situations where enzyme treatments cannot function well.
The tradeoff is that they kill the beneficial bacteria that enzyme treatments are trying to cultivate. Using both simultaneously is counterproductive. Some formulations are not safe for certain septic systems, which matters if you dump at private residences or certain campgrounds.
The Honest Assessment
Tank treatments are a support tool. They work best in a system that is already being managed correctly – with enough water, the valve kept closed, and regular dumping. In a poorly managed system, no treatment product compensates for low water levels, open valves, or months of residue buildup. Use treatments as part of a complete routine, not as the entire solution.
Black Tank Flushing and Cleaning Routine
There is a meaningful difference between dumping and cleaning. Dumping empties the tank. Cleaning removes the residue and waste film that dumping leaves behind. Both are necessary.
When to Flush
Flush the black tank every dump cycle if possible, especially during active use. If you are at a full hookup for multiple days, flush every time you dump. If you dump less frequently on a trip, flush at each dump session.
A more thorough cleaning – with extended flushing, tank rinse products, or the ice cube method (adding ice and water to agitate the tank while driving) – is appropriate before any extended storage period and at least once per season during heavy use.
Built-In Flush Systems
RVs with a built-in flush port have a spray nozzle inside the black tank connected to a separate water inlet on the exterior. Connect a rinse hose, open the black tank valve, and run water until it clears. This is the most effective routine flush method and should be used at every dump session when available.
Important: Never run the flush with the valve closed – you will overfill the tank and potentially push waste back through the toilet. Always confirm the valve is open before activating the flush.
Manual Flush Methods
For RVs without a built-in system, a wand attached to a water hose and inserted through the toilet bowl can reach most areas of the tank. Move it around the tank walls to dislodge residue. This takes longer than a built-in system but is effective when done thoroughly.
For periodic deep cleaning, filling the tank partially with water and a cleaning product designed for RV tanks, then driving a route with curves and hills, lets the water agitate and loosen residue from the walls. Dump the tank at your destination and follow with a normal flush.
Gray Tank Maintenance
Gray tanks are often treated as a lower priority than black tanks, and they generally require less intervention. However, they can develop their own odor and buildup problems that are worth understanding.
Grease, food particles from dish washing, soap scum, and hair all enter the gray tank. Unlike black tank waste, gray tank buildup tends to accumulate on the walls and in the drain lines rather than at the bottom of the tank. This coating becomes rancid over time and can produce odors that are surprisingly strong – sometimes worse than expected from a gray tank.
Management Habits That Reduce Gray Tank Problems
- Minimize grease in the drain: Wipe dishes with a paper towel before washing to remove food residue and grease before it enters the tank.
- Use a drain strainer: A small strainer over the kitchen drain catches food particles before they enter the gray system.
- Flush periodically with hot water: Running hot water through sink drains before dumping helps loosen soap and grease buildup in the lines.
- Dump before odors develop: Gray tanks left for extended periods without dumping develop stronger odors than those emptied regularly. At full hookup, the gray valve can be opened more freely than the black, but still benefits from regular cycling.
- Consider occasional treatment: Gray tank enzyme products can help manage biological buildup in systems that develop persistent odors. They are less necessary than black tank treatments but useful in problem systems.
Preventing Clogs and Pyramid Plugs
Clogs and pyramid plugs are the most disruptive problems in an RV black tank. Understanding how they form makes prevention straightforward.
How They Form
A clog forms when solid material accumulates faster than it breaks down or drains. The most common causes are insufficient water per flush, toilet paper that does not dissolve, and waste concentrated directly over the drain opening.
A pyramid plug is a specific type of blockage that forms when the black tank valve is left open at hookup. Liquids drain away continuously, leaving solids behind. Those solids dry and accumulate directly above the drain pipe, building into a cone or pyramid shape over time. This is distinct from a general clog because it forms right at the point where waste needs to exit, making drainage almost impossible.
Prevention Habits
- Use enough water: This prevents solids from concentrating and beginning to dry.
- Keep the valve closed: This is the single most effective way to prevent pyramid plugs.
- Use dissolving toilet paper: Paper that breaks apart in water cannot accumulate into a blockage.
- Flush after dumping: Removing residue between uses prevents the gradual buildup that leads to clogs.
- Dump at appropriate fill levels: Higher liquid levels mean more pressure to push waste through cleanly.
Early Warning Signs
Slow drainage during dumping is the most important early warning. If a tank that was previously draining quickly is now sluggish, something is building up. Address it immediately with additional water, treatment, and a thorough flush – do not wait until the next trip.
Tank sensors reading full when behavior suggests otherwise is another signal. This can indicate buildup on the sensor probes, which happens when waste accumulates on the walls rather than staying in suspension.
Tank Sensors and False Readings
Tank level sensors in RVs are notorious for inaccurate readings, and understanding why helps set realistic expectations.
Sensors work by detecting the presence of liquid or waste at specific points on the tank wall. When residue, toilet paper, or waste material sticks to the sensor probes, the sensor reads that point as full – even if the actual tank level is much lower. This is why many RV owners see a full reading on a tank they know has just been dumped.
Realistic Expectations
Built-in tank sensors in most production RVs are imprecise under the best conditions. They are useful as a general guide but should not be relied on for precise readings. A tank that reads two-thirds full and has been used heavily for several days is likely close to full in practical terms, regardless of what the gauge shows.
External monitoring systems that attach to the tank and measure capacitance or weight are more accurate than probe-based systems, but they add cost and complexity. For most RV owners, learning to estimate fill level by usage patterns is more practical than chasing sensor accuracy.
Basic Cleaning Approaches
Tank treatment products that include sensor cleaning components can gradually remove buildup from probe surfaces when used regularly and combined with adequate water. Some RVers use a deliberate cleaning cycle – filling the tank partially with water and a cleaning product, driving for a day, then dumping – as an annual reset for both the tank and the sensors.
Seasonal and Long-Term Maintenance
Before Storage
Dump and flush both tanks completely before storing the RV. Add a small amount of RV antifreeze if storing in freezing conditions – not just to protect pipes but to prevent residual moisture in tank lines from causing damage. Do not store tanks with any waste remaining inside.
Leave tank valves in the closed position for storage. Open valves allow pests, moisture, and outside air to enter the system.
After Long Trips
After extended use, give both tanks a thorough flush rather than a routine dump. This is a good time to use a deep-cleaning treatment and to inspect valve handles and connections for wear. If you notice any stiffness in the valves, lubricate them before the next trip rather than waiting until they seize.
General Maintenance Intervals
- Every dump: Flush the black tank, close all valves fully, add fresh treatment product.
- Monthly during active use: Inspect valve seals for seeping or odor at the connection point.
- Annually: Deep-clean both tanks, inspect and clear roof vents, lubricate blade valves, inspect hose fittings and caps.
- Before any storage period: Complete flush, add antifreeze if needed, close and confirm all valves.
Common System-Level Mistakes
- Using too little water: Every problem in the black tank – odor, clogs, sensor fouling, pyramid plugs – is made worse by low water levels. This is the most common and most consequential mistake in RV waste management.
- Leaving the black tank valve open: Creating pyramid plugs is a guaranteed outcome of this habit at full hookup sites. The convenience of continuous drainage is not worth the damage it causes.
- Relying entirely on chemicals: Treatment products supplement good habits. They cannot substitute for them. An RV owner who uses tank treatments but ignores water levels, valve management, and flush routines will have persistent problems regardless of which product they use.
- Ignoring early warning signs: Slow drainage, unexpected odors, and unusual sensor behavior are signals. Addressing them when they first appear is straightforward. Ignoring them until the problem is severe usually means professional service.
- Dumping too frequently with low fill levels: Small, frequent dumps do not clean the tank effectively and may actually increase residue buildup relative to less frequent, fuller dumps with adequate pressure.
- Skipping post-dump flushing: Dumping alone does not clean the tank. Residue remains on the walls and over the sensors after every dump. A flush cycle is what removes it.
When to Seek Professional Help
Most RV waste system problems can be managed without professional service when caught early. Some situations do require it.
- Persistent clogs that do not respond to treatment: If a tank will not drain after multiple treatment and flush attempts, a blockage may require mechanical clearing. A professional can use specialized tools to break up or remove blockages that water pressure cannot dislodge.
- Valve leaks at the connection point: A valve that seeps when closed needs replacement. This is not a problem that resolves itself, and a leaking valve creates both odor and sanitation problems.
- Structural tank issues: Cracks, separation from mounting points, or visible damage to the tank shell require professional assessment. These are uncommon but do occur in older units or after significant impacts.
- Odors that persist after correct management: If you have confirmed correct water usage, valve management, flushing, and vent condition – and odors persist – there may be a failed toilet seal, a cracked vent pipe, or a connection issue that requires hands-on diagnosis.
Professional RV service is not needed for routine maintenance, and most problems that appear serious resolve with corrected habits and a proper cleaning cycle. If a problem persists after you have addressed the root cause, that is the signal that outside help is warranted.
Related Guides
- Complete RV Dumping Guide: How to Empty RV Holding Tanks Safely – the step-by-step procedure for correctly emptying your tanks, including valve sequence, hose connection, and dump station etiquette.
- RV Water & Sewer Solutions Hub – our full resource library covering water filtration, sewer hoses, tank treatments, and more.
Explore our full RV Water & Sewer resource library: RV Water & Sewer Solutions Hub